Welcome! At Blogspot Blogger Guide we show you the easy way to customize your Blogger Blog and offer tips, tricks and fixes to take the technical headache out of blogging.

Sunday, May 9, 2010

How to Add a Facebook Share Button to Blogger

There is an easy way to add a Facebook Share Button to your Blogger blog (Blogspot blog) and have your readers share your articles on Facebook. Putting a Facebook share button onto a Blogger blog only takes a few minutes and is worth the time investment to improve the exposure of your blog. In this Blogger Tutorial I discuss the 3 different ways to put a Facebook Share button or icons on a Blogger blog from using Blogger built-in Share Buttons feature to hard coding a Facebook share button manually for greater flexibility.
How to Add a Facebook Share Button to a Blogger Blog - Six Different Options to Choose From

Last Update: Updated 26 February 2022

Why Add a Facebook Share Button to Blogger

Sharing your content on Facebook is an excellent way to attract many more visitors to your Blogger blog. By adding a Facebook Share Button to Blogger you will allow your content to be shared with all the friends of your blog visitor through their Facebook account.

When a visitor to your blog clicks on the Facebook Share Button Facebook collects post details like your blog name, post title and the first few lines of the content including the images and other media.

The Dedicated Facebook Share Buttons described in Method 3 allows a visitor to add a personalized message to a link to a blog post they want to share before sharing on their timeline, in groups, or to their friends via a Facebook Message.

The Dedicated Facebook Share Buttons look and act in a very similar way to the Twitter Retweet buttons by Tweetmeme.


How to Add a Facebook Share Button to Blogger


Method 1 - Add a Facebook Share Button Using Blogger Built-in Share Buttons

The following method will reactivate disabled Blogger share buttons which have Facebook share capabilities. IFor older templates the share buttons are added at the foot of posts. In newer Blogger themes share links are added to posts usually near the top of the page.
  1. Sign in to Blogger
  2. At the Dashboard go to Layout
  3. Find the Main Section sometimes called Post Body Section or something similar
  4. Choose the Blog Posts Gadget
  5. Choose Edit or the pencil icon on the right-hand side of the gadget

  6. Add a Facebook Share Button Using Blogger Built-in Share Buttons

  7. In the dialog box that appears scroll down until you see Show Share Buttons
  8. Toggle the switch to the on position. When turned on the switch is green
  9. Click Save

  10. Steps to Turn on or Show Blogger Share Buttons including Facebook button

  11. Click on View Blog to see a bank of buttons (typically in older templates Email This, Blog This, Twitter, Facebook and Pinterest has been added to the blog post footer area. Newer Blogger themes like Notable will have a link icon on the homepage at the foot of the post snippet and a link at the foot of the post which when clicked on will reveal links to Facebook, Pinterest, Twitter and Email.
    Blogger Share Buttons at the Bottom of a Blogger Post with Facebook Button highlighted

Method 2 - Add a Facebook Share Button on Blogger (Blogspot) Using a HTML gadget

This method involves copying and pasting Facebook Share Button code into an HTML/Javascript gadget. It is possible to add it above and below blog posts but placement is problematic which is why I recommend hard coding into your Blogger template as you can then control the exact placement.

Another option if you don't want to hard code is to go a free social bookmarking service like AddThis or ShareThis and add a bank of social sharing buttons similar to what you see on the left side of this blog post. These services provide a range of placement options and only require a bit of code to be added to Blogger via a widget.

Method 3 - Steps to Put a Facebook Share Button on Blogger (Blogspot) Under the Blog Post Title (Hard-Code Method)

Facebook offers 2 different Facebook Share Button sizes to choose from: a large button and a small button. There are also three different layouts options: Button, Button Count and Box Count.
Range of Six Different Facebook Share Buttons to Add to Blogger including Box Count and Button Count. Shows Large and Small Sizes

The following codes will place the Facebook Share Button just under the post title on the post page only. If you wish to have the button appear on the homepage as well you will need to remove the if statement.
<b:if cond='data:blog.pageType == "item"'>
Facebook Share Button Code
</b:if>

It is strongly advised that you back up (Theme >> Customize Down Arrow >> Backup) before changing your Blogger template.
  1. Login to Blogger
  2. At the Dashboard go to Theme and then click on the down arrow on the Customize Tab and select Edit HTML. Make sure you have backed up your template first (by clicking on Back up_ before proceeding
  3. Click in the template code and then CTRL + F on a PC and (CMD + F on a Mac) to bring up the search box on a PC or
  4. Enter this term in the search box and find this code: <data:post.body/>
  5. Click enter in the search box to find the second incidence of this code of the following code block:

    <div class='post-header'/>
    <div class='post-header-line-1'/>
    <data:post.body/>

    The code goes immediately below the line:

    <div class='post-header-line-1'/>

    and before:

    <data:post.body/>

    Therefore the code goes in between the two lines as demonstrated below. If you find there is other code then make sure the code you paste in goes immediately below this line:

    <div class='post-header-line-1'/>

    You are wanting to achieve the following code placement:
    <div class='post-header'/>
    <div class='post-header-line-1'/>
    Facebook code goes here
    <data:post.body/>


    Please Note
    The picture of the Facebook Share Buttons in the following examples show the old style buttons but the code will insert new style buttons as pictured above in six different Facebook buttons to add to Blogger.

    The following examples show the box count option.
    If you want just the Facebook Share Button with no count then change the type to:
    from type='box_count' to type='button'

    If you want the Facebook Button Count Share Buttons then change the type as follows:
    from type='box_count' to type='button_count'


    Large Facebook Share Button (right aligned)
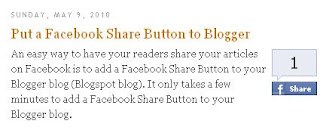
    How to Add a Large Facebook Share Button to a Blogger Blog Right Aligned
    <!-- Facebook Share Button -->
    <b:if cond='data:blog.pageType == "item"'>
    <div style='float:right;padding:4px;'>
    <div id="fb-root"></div> <script async defer crossorigin="anonymous" src="https://connect.facebook.net/en_GB/sdk.js#xfbml=1&version=v13.0" nonce="EAQ6pQXK"></script> <div class="fb-share-button" data-href="https://developers.facebook.com/docs/plugins/" data-layout="button_count" data-size="small"><a target="_blank" href="https://www.facebook.com/sharer/sharer.php?u=https%3A%2F%2Fdevelopers.facebook.com%2Fdocs%2Fplugins%2F&amp;src=sdkpreparse" class="fb-xfbml-parse-ignore">Share</a></div>
    </div> </b:if>
    <!-- End Facebook Share Button -->


    Large Facebook Share Button (left aligned)

    How to Add a Large Facebook Share Button to a Blogger Blog Left Aligned
    <!-- Facebook Share Button -->
    <b:if cond='data:blog.pageType == "item"'>
    <div style='float:left;padding:4px;'>
    <a expr:share_url='data:post.url' name='fb_share' rel='nofollow' type='box_count'/>
    <script src='https://static.ak.fbcdn.net/connect.php/js/FB.Share' type='text/javascript'/>
    </div></b:if>
    <!-- End Facebook Share Button -->


    Small Facebook Share Button (right aligned)

    How to Add a Small Facebook Share Button to a Blogger Blog Right Aligned
    <!-- Facebook Share Button -->
    <b:if cond='data:blog.pageType == "item"'>
    <div style='float:right;padding:4px;'>
    <a expr:share_url='data:post.url' name='fb_share' rel='nofollow' type='button_count'/>
    <script src='https://static.ak.fbcdn.net/connect.php/js/FB.Share' type='text/javascript'/>
    </div></b:if>
    <!-- End Facebook Share Button -->


    Small Facebook Share Button (left aligned)

    How to Add a Small Facebook Share Button to a Blogger Blog Left Aligned
    <!-- Facebook Share Button -->
    <b:if cond='data:blog.pageType == "item"'>
    <div style='float:left;padding:4px;'>
    <a expr:share_url='data:post.url' name='fb_share' rel='nofollow' type='button_count'/>
    <script src='https://static.ak.fbcdn.net/connect.php/js/FB.Share' type='text/javascript'/>
    </div></b:if>
    <!-- End Facebook Share Button -->

  6. Click Save
  7. View a blog post to see your new Facebook Share Button in action


Method 4 - How to Put a Facebook Share Button in the Blogger Post Footer (Hard Code Method)

In this method you will learn how to put a Facebook Share Button at the foot of a Blogger Post.
  1. Login to Blogger
  2. From the Dashboard click Theme
  3. Choose Backup to download a copy of your blog template before you make any changes (Strongly Advised)
  4. Choose Edit HTML from the dropdown menu
  5. Click inside the template and then CTRL + F (PC) or CMD + F for (Mac)
  6. Search for the following:

  7. <div class='post-footer-line post-footer-line-1'>

  8. Place the following code immediately above this line

  9. <!-- Facebook Share Button -->
    <a expr:share_url='data:post.url' name='fb_share' rel='nofollow' type='box_count'/>
    <script src='https://static.ak.fbcdn.net/connect.php/js/FB.Share' type='text/javascript'/>

    <!-- End Facebook Share Button -->

  10. Click Save
  11. View blog and admire your new Facebook Share Button at the foot of your Blogger posts


Summary

Today you have learned how to add a Facebook Share Button to your Blogger blog using three different ways. The Facebook Share Button will allow your readers to share your content which will attract new visitors to your blog. Adding a Facebook Share Button to your post pages only takes a few minutes.


Related Links

Add a Follow Me Twitter Icon Button to Blogger
How to Remove the Blogger Navbar
How to Change the Color of the Blogger Navbar
How to Increase the Image Size in a Blogger Blogspot Blog
How to Add a Print Friendly Button to Blogger
How to Change the Date of a Blogger Post
How to Remove Blogger Labels Counter
Make Money From Affiliate Banner Ads and Links with Blogger
How to Get More Adsense Clicks with Blogger
Easy Ways to Put Banners on Blogger



Subscribe to Blogspot Blogger Guide Full RSS Feed

Subscribe to Blogspot Blogger Guide by Email

Tuesday, May 4, 2010

Add a Print Friendly Button to Blogger to Print Out Blog Posts

Attention Blogspot bloggers I have found a really easy way to allow visitors to my Blogger blogs to print out my articles. Today I am going to share with you this very easy trick which is absolutely free. It only takes a few minutes to install a printer friendly button at the foot of your Blogger posts or in the Sidebar and you will be adding a lot of functionality to your blog. (Updated as at 18 February 2022).

How to Add a Print Friendly Button to Blogger so Visitors Can Print Out Blog Posts

Advantages of Adding a Print Friendly Button to Blogger


  • The Print Friendly button is absolutely free
  • It creates an attractive print friendly version of your blog article that is print optimized.
  • There is an option to print in PDF format or save in PDF format
  • Removes unwanted content such as Google ads
  • Provides flexibility to remove unwanted text and only print out what is important to the reader
  • All images can be removed leaving only the text thus saving paper and ink
  • Minimizes the risk of readers copying and pasting your material because they don't know how to print out

How to Add a Print Friendly Button to Blogger with PrintFriendly

The PrintFriendly button is a very handy gadget. When a visitor clicks on the button it will take them to an article preview screen and offers some printing and sharing options. There is the option to print out the article directly with or without images. Alternatively the article can be downloaded as a PDF file or a link to the article emailed. PrintFriendly even lets you share the article via a Twitter Tweet button.


How To Add a Print Friendly Button to your Blogger blog


There are two ways to add a Print Friendly Button to Blogger.
  1. The first and by far the easiest way is to add a Print Friendly button to the sidebar or below your Blogger posts using an HTML / Javascript widget.
  2. The second is to hard code the Print Friendly button directly into your blog which will give you much greater flexibility in terms of placement.

Method 1 - To Add a Print Friendly Button to Allow Readers to Print Your Blog Posts

  1. Sign in to Blogger and select the blog you want to add the printer friendly button to.
  2. From the Blogger dashboard go to the Layout menu
  3. Decide where you want your gadget. The sidebar is an easy choice. Scroll down until your find the Sidebar section of your template
  4. Click on the Add a Gadget link in the sidebar
  5. Choose the HTML/JavaScript gadget

  6. How to Add a Free Print Button from Print Friendly to Blogger Using an HTML/Javascript gadget

  7. Open a new window in your browser and navigate to the PrintFriendly website.
  8. Scroll down to the bottom of the page and click on the Blogger icon
  9. Select the HTML radio button at the top left of the page
    How to Add a Free Print Button to Blogger Using an HTML/Javascript gadget - Make Sure HTML is selected and choose from a range of buttons on the PrintFriendly website

  10. Choose a PrintFriendly button by selecting the radio button beside it. Print Friendly offer at least 12 different buttons.
  11. Select the features you want from the Features Menu or go with the default settings displayed. You may decide to turn off email as a way to have more control of how your article is shared on the internet.
  12. Once you are happy with all the features settings copy the code that is displayed below the features.
  13. Now return to the HTML gadget and paste the code into the gadget
  14. Select Save
  15. Scroll to the bottom of the Layout Menu and click on the Preview Button
  16. You will now see your PrintFriendly Button as it will appear on your live blog.
  17. Click the back button of your browser to return to the Layout Menu
  18. If you are satisfied with the location of the button click Save at the bottom right-hand corner. If not you may need to play around with the positioning to get the optimal place in the sidebar.

Method 2 - To Add a Print Friendly Button to Allow Readeers to Print Your Articles


(Note: Before you attempt this make sure you have backed up your Blogger Template)

  1. Log in to Blogger and select the blog you want to add the printer friendly button to.
  2. From the Blogger dashboard click Theme from the side menu
  3. Select EDIT HTML from the drop down menu

  4. How to Add a Free Print Button from PrintFriendly to Blogger By Hard coding it into the Blogger template - Select Edit HTML to get started on this step by step walkthrough

  5. Click in the code box and then use CTRL + F to find the following code:
    <div class='post-footer'>
  6. Open a new browser window go to the PrintFriendly website
  7. Scroll down the home page until you see the Blogger icon, then click on it.
  8. Make sure the HTML radio button is selected at the top of the Button page
  9. Select the radio button for the PrintFriendly Button that you think will integrate best with your Blogger blog. (There are at least 12 to choose from).

  10. Choose from a range of Print Friendly button options
  11. In the Features menu select the features that you want your PrintFriendly button to have or go with the default. I suggest you think about whether you want readers to be able to email your posts.
  12. Copy the code snippet for your chosen button
  13. Then go back to your open Blogger window and find the code you identified in Step 4 of these instructions.
  14. Paste the code directly after the <div class='post-footer'> tag
  15. Save your changes to the Blogger template
  16. From the Dashboard click View Blog to see your PrintFriendly button beneath each post.

Summary

Today I introduced you to the PrintFriendly button - a completely free button that print optimizes your Blogger posts and allows readers to print directly from the post. I discussed some of the main advantages of adding the printer friendly button to Blogger and I provided you with comprehensive instructions to add the button to your Blogger template by either using an HTML/ Javascript gadget or by hard coding it into your Blogger HTML code.

If you found this article helpful please let me know by commenting below. I would be interested in your experience.

Related Links

How to Add a Welcome Message to a Blogger Homepage
How to Change the Color of the Blogger Navbar or Remove It in Layout
How to Unlock or Delete Locked Blogger Widgets
How to Put a Twitter Icon on Blogger Next to Blog Post Title
How to Delete a Google Blogger Blogspot Blog in 2022
How to Add a Copyright Notice to a Blogger Blog


Tuesday, October 6, 2009

Remove Blogger Labels Counter or Turn On Counter in a Blogspot Blog

Until recently the only way to turn off, disable or remove the counter of the labels widget in Blogger was to use a Blogger hack. Luckily Blogger has now added a new feature so that Blogspot bloggers have a choice about whether to show or not show a post count next to the corresponding tag when using the Blogger labels widget. (Updated as at 18 February 2022)
How to Turn On or Turn Off Blogger Labels Counter in a Blogspot Blog

How to Turn Off  / Remove / Delete the Blogger Labels Counter?

If you already have a Blogger labels widget installed and you are using an older template then Blogger shows a count of the number of posts with that label or tag next to each label by default. If you want to turn off the label counter you will need to disable it.

Removing the Blogger labels counter is easy and only takes a minute. Switching off the labels counter can be useful sometimes for instance when establishing a new blog where a limited number of posts may deter visitors. Fortunately Blogger has listened to users and now installs a new blog with the Labels Counter turned off.
How to Remove Blogger Labels Counter or Turn On Counter in a Blogspot Blog

Conversely you may find that your Blogger label counter has been disabled and you want to reinstate it. In this case you would navigate to Blogger and follow these steps except that you would reverse Step 4.

Blogger labels gadget showing the number of posts enabled Blogger labels gadget showing the counter of the number of posts disabled

  1. Log in to Blogger
  2. At the Dashboard go to Layout Menu
  3. In the Blogger sidebar click on the pencil or click the edit link to edit your Labels Gadget
  4. Use the toggle button to switch between on (blue-green) and off positions (white) in the Show Number of Posts Per Label heading.
  5. Click on Save
  6. View your Blogger blog without the number of posts shown next to the labels tag

Blogger Configure labels gadget - labels counter can be toggled on and off by using the slider

Turn Labels Counter in Blogger On and Off - older style interface of configure labels gadget

#bloggertutorials #blogspot #bloggergadgets

Summary
Today you have learned how to turn off the Blogger labels counter so that no count of the number of posts is shown next to the label in a Blogspot blog. Disabling this feature only takes a minute and can be a useful feature for new blogs with few posts. If you are new to Blogger and blogging you can learn more useful tricks and tips for customizing your blog at Blogspot Blogger Guide. Watch out for more Blogger tutorials in this series of Blogspot Tutorials for Beginners.


Related Links
How to Put a Copyright Notice on a Blogger Blog
How to Add a Print Friendly Button to Blogger
How to Change the Date of Blog Posts in Blogger
Add a Follow Me Twitter Icon Button to Blogger
Easy Ways to Put Banners on Blogger
How to Add a Welcome Message to Blogger Homepage
How to Unlock or Delete Locked Widgets in Blogger
Making Money From Affiliate Banners and Links with Blogger
How to Get More Adsense Clicks with Blogger
Easy Ways to Put Affiliate Ad Banners on Blogger

Monday, October 5, 2009

How to Put a Twitter Follow Me Button Icon on a Blogger Blog

Would you like your Blogger blog visitors to be able to follow you on Twitter? Or perhaps just provide the option to Tweet something about a post you have written. It's easy when you put a dedicated Twitter follow button on your Blogger blog (Blogspot blog). Let me show you how.
How to Put a Twitter Follow Me Button Icon on a Blogger Blog

Latest Update: Updated on 26 February 2022

Just follow the instructions below to add a Twitter follow me button to Blogger to encourage your readers to follow your Twitter tweets. This is an easy way to attract new traffic to your blog and it only takes a few minutes.
Instructions on how to Put Share and Follow Twitter Buttons and Icons on Blogger

This Blogger tutorial is easy and doesn't involve changing your Blogger template.
How to Add a Free Twitter Follow Button to a Blogger Blog

How to Put a Twitter Icon on Blogger (Blogspot)

There are lots of Twitter icons to choose from. Below are several to get you started. Remember you can change this Twitter icon or button for another if you find a better one simply by changing the URL address of the image.

  1. Log in to Blogger
  2. At the Dashboard go to Layout 
  3. Click Add a Gadget in the sidebar or where ever you want to place your Twitter icon
  4. Choose the HTML/Javascript gadget
  5. Copy and paste the following HTML code for the icon into the content box

    Free Twitter Button 1 - How to Put a Twitter Follow Me Button Icon on a Blogger Blog
    <a href="https://twitter.com/Your-Twitter-Username"><img width="150" src="https://blogger.googleusercontent.com/img/b/R29vZ2xl/AVvXsEgKc2rGote0bsR7VtHMulwHQpU8j_uN7DAPLAd14imYUigB7liNS71vKsbIzcaHPPs4cZkcyclOAkvZ39_456ZdNW0gE9BRm3DspfzCrrrSb7YZPN0bexZcpSG1Xi-JTWHuNuu-85Dc_l1T/s320/twitter-34c.png" height="124" title="Follow Me on Twitter"/></a><br/>


    Free Twitter Button 2 - How to Put a Twitter Button Icon on Blogger
    <a href="https://twitter.com/Your-Twitter-Username"><img width="175" src="https://blogger.googleusercontent.com/img/b/R29vZ2xl/AVvXsEgJJp9fr_mYowcPC2G4bqOscUVrK4RP1vZFZjNJbSoH1wSh6cBhp1uQZ9o5DqHmGLgK1rHqDEyMSNYJtGs8-senOFPp34DDavnpl3ujD6s-IT6CJQDOM941DjIbThyphenhyphenKoTd2zOd0sg3VoLeW/s320/twitter8gif.gif" height="81" title="Follow Me on Twitter"/></a><br/>


    Free Twitter Button 3 - How to Put a Twitter Button Icon on Blogger
    <a href="https://twitter.com/Your-Twitter-Username"><img width="152" src="https://blogger.googleusercontent.com/img/b/R29vZ2xl/AVvXsEisZPXqyqkhq8XmTBBhfrBULTJxvvsLWCOue17LfvcrTlM14XY1gxDOK8-sF_E-ZgL9vcxw65BIONtfVNH7qjs95iXIlgpFVGQRQSSn1rppZaKhSwmU9HpORs4ZPF53kUIwHdAsc9_rOjnF/s320/nt11.png" height="68" title="Follow Me on Twitter"/></a><br/>
  6. Change Your-Twitter-Username for your own Twitter username
  7. Click Save
  8. View your blog to see the Twitter icon in your Blogger sidebar


Twitter Follow Me Buttons

There are heaps of free Twitter Follow Me buttons to download from the internet. My advice is if you find an icon or button you like be sure to check the licensing arrangements before using it on your Blogger blog. Many icons are only free for personal use rather than commercial use and therefore not suitable if your intention is to monetize your blog. In your search look for the phrases like public domain, no attribution required and Creative Commons (CC0) to ensure you have permission to use the icon or button commerically.
How to Search for Free Twitter Follow Me Buttons

You may be tempted to just download a button in a search of Google images but be aware that you will need a PNG file with a transparent background for your button not just a jpeg or jpg. Also your button will need to be hosted somewhere. You can upload it to Blogger or Google Drive for instance and then just use the same code above in your Blogger gadget and simply change the URL of the image.
Twitter Follow Me Button

If you are not looking for anything too fancy you could just use the buttons provided by Twitter. You can get the code from Twitter for a simple follow button with the option to display a count of your Twitter followers.

Twitter Share Buttons

Another option if you want sharing buttons rather than follow buttons beyond what Twitter offers is to use free services like AddThis and ShareThis. These sites provide code that you can quickly add to Blogger to create a bank of buttons including Twitter similar to what you see on this site.
Free Twitter Follow buttons for Blogger

For sharing content and embedding tweets you can also go to Twitter to put the button displayed here on your post somewhere so readers can go directly to Twitter and immediately tweet something about your post if they are signed in.


Summary

Today you have learned how to add a dedicated Twitter follow button to your Blogger blog. If you follow the instructions above you will have your Twitter button or badge up and running in no time. You also learned how to add a tweet button from Twitter. If you want other button designs for the follow button you can still use the method above but you will need to have the image hosted on the internet somewhere or else upload it to Blogger yourself and then just change the url of the image.


Related Links

How to Change the Color of the Blogger Navbar on a Blogspot Blog
How to Remove or Hide the Blogger Navbar on a Blogspot Blog
How to Add a Copyright Notice to a Blogger Blog
How to Turn Off the Labels Counter on a Blogger Blogspot Blog
Easy Ways to Put Banners on Blogger
Making Money From Banners with Blogger
How to Get More Adsense Clicks with Blogger
Blogger Guide to Google Adsense Placement

Wednesday, May 6, 2009

How to Position Adsense Units on Blogger to Earn Extra Money

Want to know more about how to make money with Google Adsense and your Blogger blog (Blogspot blog)? A lot of bloggers make money blogging solely from Google Adsense clicks. Placement of your Adsense ad units on your blog is critical if you are to earn money. In this article I will give you some tips about some of the basics of placing Google Adsense ad units on Blogger from my own experience so that you will earn extra money from your Adsense banners.


Tips for Adding Google Adsense to a Blogspot Blogger Blog


  • Use the Google Adsense Heat Map Placement Guide

    First take a look at the Google Adsense Heat Map that shows you the hot and cold positions of Google Adsense ad placement. Notice that a lot of the primary positions where you would put Google Adsense are around the main content. If you use this Google Adsense Heat Map as a guide to your Adsense placement you will start to earn extra money from your ad units.

    Google Adsense Heat Map - Better Placement of Google Adsense on Blogspot Blogger

  • Decide on How Many Adsense Ads?

    Just because Google Adsense rules allow more than three ad units per page doesn't necessarily mean it is a good idea to put more than three on a page. If your blog is fairly new and your traffic low at this stage more than two maybe overkill.

    One strategy is to position your ad units by placing one above the first post or around the title and another at the foot of the post. This placement strategy has worked successfully for me in the past.

  • (Update 2020: Google Adsense now allow a lot more ad units since I wrote this.  If you don't want to think too much about ad placement consider using Google Adsense Auto Ads. If you are intent on customizing your Google Adsense ads the Google Adsense heatmap still pretty much applies as a guide to ad placement.)


  • Best and Worst Performing Google Adsense Ad Units

    • I have found that my best performing Google Adsense ad units is 336x280. This sized unit has been very successful in the position above the post and under the post title. Both of these areas are Adsense hotspots as depicted in orange. If this size is not an option you could try a 728x90 leaderboard which is a high performance unit too.
    • I don't particularly like a 468x60 Adsense ad unit in the header. I haven't found this a particularly high performing unit either. Instead I now reserve this slot for my favorite affiliate banner rather than an Adsense ad unit
    • All my Adsense vertical skyscraper ad units such as 160x600 in the sidebar of my blogs have been a waste of time and I have now gotten rid of them. Notice how this is borne out by the white low performing area of the Blogger sidebar
    • I have had mixed success with the linked units such as 728x15 in the Blogger header. They do work on some blogs where there is no navigation menu so I have decided to keep them on in the meantime.


Summary


In this post I have given you the benefit of my experience with respect to strategically placing Google Adsense ad units on a Blogger blog to earn extra money. I strongly suggest following the Google Adsense Heat Map which is an authoritative guide to ad unit placement. If you want to earn extra money try out a 336x280 unit and dispense with any sidebar skyscrapers and 468x60 header banners unless you are sure they are actually good earners. Any questions or if you would like to let me know how you get on please don't hesitate to comment.


Related Links

Making Money From Affiliate Ad Banners Links with Blogger
How to Get More Adsense Clicks with Blogger
Easy Ways to Put Banner Ads on Blogger
7 Tips for Choosing a Great Blog Topic
How to Put a Copyright Notice on a Blogger Blog
How to Add a Print Friendly Button to Blogger
Change the Date of a Blogger Post to a Future or Past Date
Add a Follow Me Twitter Icon Button to Blogger


Subscribe to Blogspot Blogger Guide Full RSS Feed

Subscribe to Blogspot Blogger Guide by Email