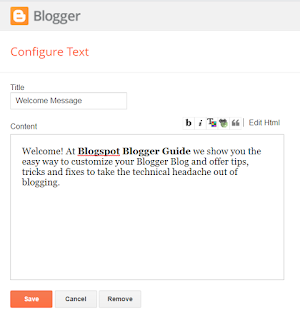
Welcome! At Blogspot Blogger Guide we show you the easy way to customize your Blogger Blog and offer tips, tricks and fixes to take the technical headache out of blogging.

Showing posts with label How to. Show all posts

Tuesday, April 5, 2022

Change Blog Post and Sidebar Width of a Blogger Theme

In today's Blogger tutorial I discuss how to change column width of both the sidebar and the blog post area of a Blogger Theme to either increase or decrease the size of the template displayed on the screen. I show you two methods of adjusting the width of the template: firstly through the Blogger Template Designer and secondly by making a small change to the template itself. These modifications are easy to achieve, only take a few minutes and will help you achieve the look you are after on your Blogspot Blog.
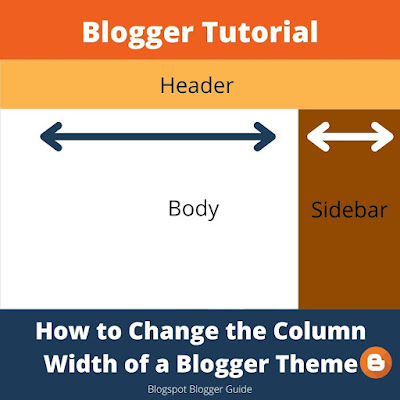
How to Change the Column Width of a Blogger Theme and Sidebar - Two Methods - Adjust width in Blogger Theme Designer or Edit Template and manually change the code

Older Default Blogger Themes

By default older Blogger templates eg Simple Blogger Theme were not full width but there was always the facility to increase or decrease the width of the columns of template according to user requirements. In the past it was recommended to keep the width of a Blogger blog under 1000px to ensure that visitors viewing on smaller screens did not have to keep scrolling to see the whole blog. Those days are gone now with responsive templates and the use of small devices like tablets and smartphones so it is fine to increase the entire width of your blog to 100% if you wish to.
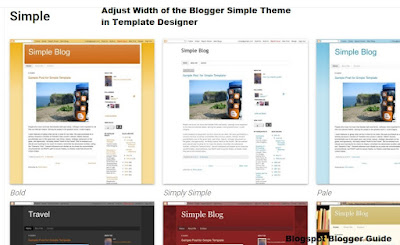
The Column Width of older style Blogspot themes like Simple Template can be adjusted in the Blogger Theme Designer

Third Party Blogger Themes

If you are using a third party theme you may not be able to use the Blogger theme designer to adjust widths depending on how it was coded. You will still be able to use Method 2 as discussed below to make adjustments to the column width of the entire blog and / or the sidebar.

Newer Responsive Blogger Themes (Contempo, Soho, Emporio)

Newer responsive Blogger templates eg Notable Blogger template are already set at 100% width minus the sidebar so there is generally no need for tweaking the width.


How to Adjust the Column Width of Blogger Blogs


There are two basic ways to adjust the width of a Blogger template / Blogger Theme:

  1. Adjusting the width in Theme Designer of Blogger (or if this is not available)

  2. Changing the code within the Blogger template to the desired width


Method 1: Steps to Change the Width of a Blogger Template in the Theme Designer

  1. Login to Blogger

  2. At the Dashboard choose Theme

  3. Click on the orange Customize button which will take you to the Blogger Theme Designer

  4. On the left-hand menu click Adjust Widths

  5. How to Change the Column Width of a Blogger Theme and Sidebar in the Blogger Theme Designer Using the Slider to Set Desired Width in px

  6. Adjust the width using the slider to increase or decrease the width of the entire blog. Any changes you make can be viewed in the large window on the right-hand side.
    For example: To make your blog full width push the slider all the way across to 1500px.

  7. You can also change the width of the sidebar. By sliding the bar to the right you can increase the column size of the sidebar dimensions to a maximum width of 500px.

  8. Click on the Save button in the bottom right-hand corner of your screen.


Method 2: Steps to Change the Width of a Blogger Template in Blogger Edit HTML


If you are not able to edit the width of your Blogger template in Theme Designer then you will need to adjust the widths manually in the template itself.
  1. Login to Blogger

  2. At the Dashboard choose Theme

  3. Click on the down facing arrow next to the orange Customize button

  4. Choose Backup to make copy of your existing template in case you need to reinstae it

  5. Now choose Edit HTML

  6. Click anywhere inside the template and then CTRL + F (Command + F on a Mac) to bring up the search function

  7. Enter the following search term into the search window and press enter:

    b:template-skin

  8. Look for the following code:

    <b:template-skin>
    <b:variable default='960px' name='content.width' type='length' value='960px'/>
    <b:variable default='0' name='main.column.left.width' type='length'/>
    <b:variable default='310px' name='main.column.right.width' type='length'/>


  9. Change the value of the content width of the template to whatever width you would like eg for an entire blog width of 1200px the code would look as follows:

    <b:template-skin>
    <b:variable default='960px' name='content.width' type='length' value='1200px'/>
    <b:variable default='0' name='main.column.left.width' type='length'/>
    <b:variable default='310px' name='main.column.right.width' type='length'/>


  10. To change the sidebar width (assuming you have a right sidebar) change the main.column.right.width to a new width by changing its value or adding a value if not already there as in this example. eg For a sidebar of 500px the code would look like this:

    <b:template-skin>
    <b:variable default='960px' name='content.width' type='length' value='960px'/>
    <b:variable default='0' name='main.column.left.width' type='length'/>
    <b:variable default='310px' name='main.column.right.width' type='length' value='500px'/>


  11. Click on the Save icon in the top right-hand corner to save your changes.

  12. From the Dashboard click on View Blog to see your Blogger template with the widths you have input.

In this Blogger tutorial you have learned how to change the column width size of your Blogger template to increase or decrease the width of the entire blog and the sidebar. Changes to the width of the columns is best achieved by using the Blogger Template Designer but if this not available for some reason I have also shown you how to adjust the width manually by making small changes to the HTML of your Blogger template.


Related Articles

Easy Way to Put Banners on a Blogger Blog
Add a Widget or Gadget Above a Blog Post in Blogger
How to Delete a Blogspot Blog from Blogger - Step-by-Step Guide to Remove a Blog
How to Add a Welcome Message to the Blogger Homepage
How to Add a Blog Description to the Blogger Header of a Blogspot Blog

Sunday, April 3, 2022

How to Delete a Blogspot Blog from Blogger 2022 (Step-by-Step Guide to Remove a Blog)

In this Blogger tutorial I discuss how to delete a Blogspot blog from the Google Blogger platform. This is not a difficult task but I suggest that unless you are absolutely sure you will never use the content of your blog for any other purpose and you definitely want to remove your blog that you at least backup before deletion. It is possible to restore a deleted Blogger blog if you change your mind within a 90 day period but thereafter a deleted Blogspot blog is gone forever.
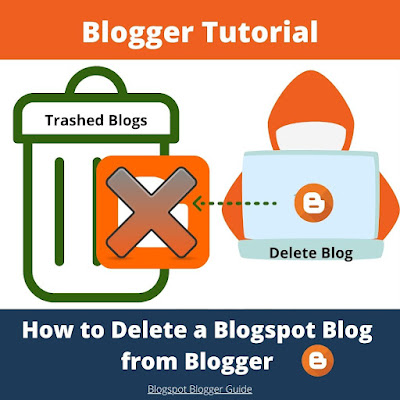
How to Delete a Blogspot Blog from Google Blogger Platform - Step-by-Step Guide to Remove a Blog

How to Delete a Blogspot Website Permanently from the Blogger Platform (Easy Steps)

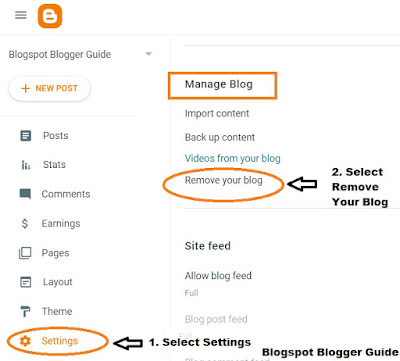
When a blog is deleted from the Blogger platform the blog owner has a 90 day period in which the blog can be recovered before it is permanently deleted. To delete a Blogspot website from Blogger follow these simple steps:
  1. Sing in to Blogger and select blog to delete
  2. Click on Settings from the Dashboard
  3. Then click Manage Settings
  4. Choose Remove Your Blog
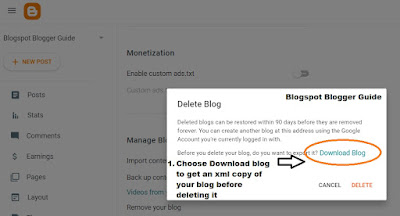
  5. Download a copy of the content of your blog in xml format (optional)
  6. Select Delete

See my step-by-step guide to deleting a Blogger blog below for a detailed walkthrough.


How to Delete a Multiple Blogspot Websites Permanently from Blogger

Unfortunately there is no tool to manage deleting multiple blogs from Blogger. If you have several blogs that you want to delete at the same time you will need to delete each one individually using the methods shown.


How to Delete a Blogger Account

If you want to delete a Blogger blog follow the steps outlined above and in the step-by-step walkthrough below. If however you want to delete your Google account which includes your gmail this is a different process.


Reasons to Remove or Delete a Blogger Blog

There are a lot of reasons to choose to remove or delete a blog from the Blogger platform some of which are:
  • Your blog is not viable
  • The content of your blog is too old and you can't be bothered to refresh it
  • The blog takes too much work
  • You blog is not making enough money to make it worth the effort
  • You want to transfer your blog to Wordpress or another website platform like Wix or Squarespace

These are good reasons to consider deletion of a Blogspot blog. However, if your are deleting Blogger not because you have lost interest but because you have struck a problem, technical or otherwise, then deletion may not be the best solution.

Weigh up your decision before deleting a blogger blog. Is there some other solution or do you just want it removed

If you are still keen to maintain your blog but it has just not succeeded as you would have liked or you are unsure about deleting it and looking for advice then I suggest you first take a look at my upcoming article in which I discuss a variety of scenarios about whether or not to delete a Blogger blog in each of these situations.


Steps to Delete a Blogspot Blog from Blogger
  1. Login to Blogger

  2. From the Dashboard click on Settings

  3. Scroll down to Manage Settings


  4. to delete a blogger blog choose settings, then find remove your blog in the manage blog section in Blogger

  5. Click on the Remove Your Blog link

  6. A pop up window will appear.

    • Click on the Download blog link to download a copy of your blog in xml format. Note this not a readable copy of your blog.

    • If you would like a copy of your blog posts as a memento or to turn into a book refer to my Blogger Tutorial on How to Convert Blog Posts in Blogger into a PDF document and Make Your Blogger Blog Posts into a Book.

    Before deleting a blogger blog make sure you download an xml copy of your blog under settings manage blogs remove your blog

  7. Once ready to delete select the Delete button in the pop up window to delete your blog. Google reminds you that you have 90 days change of heart period in which you can restore your blog. Thereafter your blog is deleted and gone for good.

For step-by-step instructions on how to restore or recover a deleted blog please go my Blogger tutorial how to restore a deleted Blogger blog.

Today's Blogger tutorial has covered how to delete a blog from Blogger. It has also included instructions on how to back up your blog prior to deletion. Blogger makes it possible to restore a deleted blog within 90 days of deletion just in case.

#deleteblogspotblog #deleteblogspot #deleteblogger

Related Articles

How to Remove the Date Header From Blogger Posts
How to Delete Locked Blogger Widgets and Fix Blogger Widgets Not Showing
Remove Blogger Labels Counter or Turn On Counter in a Blogspot Blog


Thursday, March 31, 2022

How to Change the Date of Blog Posts in Blogger

Blogspot gives content creators on the Blogger platform the option to change the date of any blog post. This means that it is possible to both postdate a blog post to sometime in the future or backdate a Blogger post to a date in the near or distant past. In this Blogger tutorial I show you how to change the date of a blog post in Blogger for both old articles and new posts and discuss reasons why changing dates needs to be done with care.
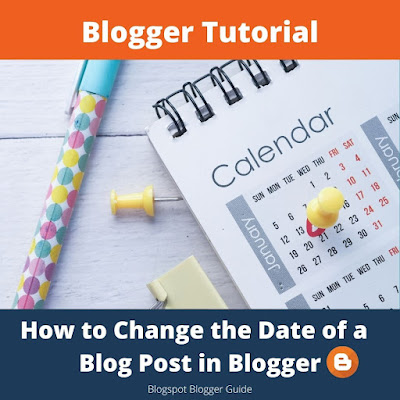
How to Change the Post Date of Blog Posts in Blogger to a date in the future or the past

You will learn about:

Backdating a Blog Post in Blogger
Steps to Backdate an Existing Blog Post in Blogger
Scheduling or Post Dating Blog Posts in Blogger
Steps to Schedule or Post Date Blog Posts in Blogger

Backdate Blog Posts in Blogger

Blogger gives you the option to backdate a blog post to any date as far back as about 1970. Postdating blog posts has to be done with care though and should not be overused. The main reason for this is that SEO can be detrimentally affected as Google's algorithm is weighted to some degree toward fresh content.

However if you need to have your blog posts in chronological order for some reason backdating posts is a great way to achieve this. If you have a bunch of old articles you want to refresh and then publish on a current or recent date Blogger will allow you do this too.

For more information on backdating blog posts in Blogger check out my article How to Backdate Blogger Posts or Publish Articles on a Retrospective Date


How to change the date of a blog post in Blogger and then publish on a retrospective date. Useful to keep blog articles and content in chronological order and to reorder the timeline of articles

Steps to Change the Date of an Existing Blog Post in Blogger

  1. Log in to Blogger

  2. Click on Posts and scroll to find the existing post you want to change the date of

  3. Open the Post by clicking on it. The Blogger Post Editor will open.

  4. On the right-hand side of the Compose Box in the editor you will see a menu - click on Published

  5. Select the Set Date and Time radio button

  6. Use the calendar to set a retropective date

  7. If you need to change the time click on it and select a new time from the drop-down box that opens

  8. Click the orange Update button save the change of date

  9. Click Preview to make sure the date and time are showing correctly

Postdate, Schedule or Future Date Blog Posts in Blogger

If you would like to publish your blog post on a date in the future you can do this by scheduling the blog post date to any date of your choosing. Blogger will publish your blog article on the date and time when it rolls around.

The facility to postdate Blogger posts is useful for those on a busy schedule. Improve your productivity and efficiency by planning ahead of time and publishing posts in advance. This is particularly useful if you are going on vacation and do not want to disrupt your posting schedule.
How to schedule blog posts in Blogger for a future date to improve productivity and efficiency

There are virtually no disadvantages of scheduling posts in advance except perhaps that if you happen to make a mistake on your blog post you may not catch it before it goes live. I suggest you check your article thoroughly before setting it to a future publication date.

For a more in-depth discussion on scheduling blog posts in Blogger please refer to my article on How to Future Date / Schedule Blog Posts to a Specific Date and Time


Steps to Schedule a Future Date for a Blog Post in Blogger

  1. Log in to Blogger

  2. Create a New Post or Open a Draft Post

  3. Select Published from the menu on the right-hand side

  4. Select the Set Date and Time radio button

  5. Use the calendar to set a future date for your blog post

  6. Change the time by clicking on it and selecting the time you would like the post to be published on from the times in the dropdown box

  7. Under Preview click Save and finish making other improvements to your blog post

  8. When ready to publish click on the orange Publish button

  9. From the Dashboard select posts and you will see that your post will be labelled scheduled for the date in the future you selected.


Summary

In this Blogger Tutorial you have learned how to change the date of an existing blog post for a Blogspot blog and how to schedule blog posts to publish on a future date. Also discussed are reasons you might want to change the post date. For SEO reasons backdating posts in Blogger needs to be done with care.


Related Links

How to Schedule a Blog Post to a Future Date in Blogger
How to Backdate Blogger Posts or Publish Articles on a Retrospective Date
Easy Ways to Put Banners on Blogger
How to Put a Twitter Follow Icon Next to Blog Post Title in Blogger
How to Add a Facebook Share Button to Blogger
How to Unlock or Delete Locked Widgets in Blogger
How to Add a Sticky Welcome Message Above Posts in Blogger
How to Add a Welcome Message to the Blogger Homepage


Tuesday, March 22, 2022

How to Add a Blog Description to the Blogger Header For a Blogspot Blog

In this Blogger Tutorial for beginners new to Blogspot blogging I show you how to quickly add a blog description to your Blogger blog. A blog description is the one line tagline that is displayed in the header under the blog name in Blogger. Adding a blog description to Blogger is easy to achieve and will help both search engines and your audience know about your blog topic.
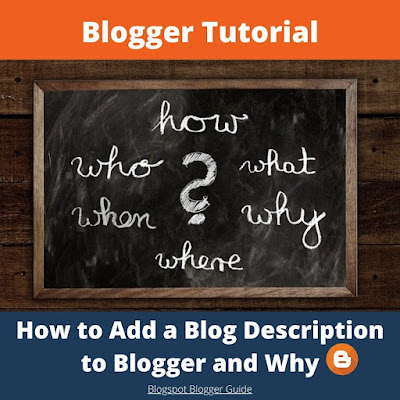
How to Add a Blog Description to a Blogger Blog and Why it is Important for Search Engines and Blog Visitors

Why is a Good Blog Description Important?

A Blogger blog description needs to clearly and succinctly say what the blog is about. It needs to be well-crafted if you are going to use it as a tagline in your header to hook potential readers to your blog. With just a few well chosen words the role of your blog description is to spark a reader's interest enough to decide to visit your blog.

If you would like to know more about how to write a good blog description for showcasing your Blogspot blog / Blogger blog take a look at my companion article where I discuss tips for writing a well-crafted blog description and the SEO benefits for search engines and visitors. I will also show you some examples of well written blog descriptions to help you write the best blog description for your blog.

How to Add a Blog Description to a Blogger Blog - Step-by-step walkthrough to put description onto blog through the settings menu plus discussion why it is important to write a good blog description

Also bear in mind it is possible to hide the blog description if you want to write a longer description for your blog that doesn't display to readers but is visible to search engines. If you are interested in hiding the blog description on your Blogger blog I will be discussing how to do this in an upcoming post.

Steps to Add a Blog Description to Blogger


Step 1
Login to Blogger

Step 2
Go to the Settings Menu on the lefthand side

Step 3
In Basic Settings below Blog Name you will find the space to enter a blog description
to add a blog description to Blogger blog go to settings and then under Basic you will find description box under the blog name

Step 4
Click on the word description to bring up the dialog box
to add a blog description to Blogger blog click on description box under the blog name and enter a descriptive tagline for your blog

Step 5
Enter your chosen description
For example I have used "Tips, Tricks and Strategies to Customize a Blogger Blog"
How to Add a Blog Description to Blogger - once saved the description will appear under the blog name in the header of your blog on blogspot

Step 6
Click Save

Step 7
Click the Preview Button located at the bottom of the Layout Menu on the righthand side

Step 8
View how your description will look on your live blog. Check for any errors.

Step 9
Click the back arrow in your browser to go back to the Settings menu.

Step 10
Go ahead and click the Save button located at the bottom of the Layout Menu on the righthand side to commit your changes. Or if you need to make any further changes click on the Description again and repeat Steps 5 to 9.


#blogspottutorial #bloggertutorial #blogdescription

Summary

In today's Blogger tutorial I have discussed the steps to add a blog description to a Blogger Blog. I also covered the importance of writing a good blog description that is well-crafted and will attract visitors to your blog.


Related Articles

How to Choose a Great Topic for a Blogger Blog in 2020
How to Add a Blog Welcome Message to a Blogger Homepage
How to Change the Color of the Blogger Navbar
How to Change Image Sizes in Blogger Posts
How to Resize Images in Blogger to User Defined Dimensions
How to Schedule Blog Posts in Blogger for a Specific Future Date


Monday, March 7, 2022

How to Change the Color of the Blogger Navbar Menu

This Blogspot tutorial shows you how to change the color of the Blogger Navbar which appears above the header in older Blogger themes when enabled. Changing the color of the Blogger Navbar so that it matches the color scheme of your Blogger blog takes less than a minute and is an easy trick that requires no change to the Blogger code as all changes are done in the Navbar Gadget. Updated April 2022

To go straight to the step-by-step tutorial on how to change the color of the Navbar or read on for details about the Navbar and its purpose.
How to Change the Color of the Blogger Navbar or Delete It 2022

What is the Blogger Navbar?

The Blogger Navbar is the colored or sometimes transparent search bar menu that appears by default at the top of older Blogger themes above the header. The Navbar provides quick navigation links that make it easy to jump to the Blogger Dashboard, start a new post, access Theme Designer or share a page directly from your live blog.

Example of an Active Blogger Navbar Read On to Learn how to Change the Color
Blogger Navbar Example

Currently Blogger offers the choice of 6 different Blogger Navbar colors: blue, tan, black, silver, transparent light and transparent dark. Transparent light and transparent dark are the most recent additions. It is uncertain how likely it is that Blogger will continue to offer more color options for the Navbar in the future as Google has announced that it will not be developing the Blogger platform anymore.

How to Change the Color of Blogger Navbar - The Blogger Navbar offers a choice of 6 Colors that can be selected in the Navbar Gadget
The Blogger Navbar Gadget Can be Customized to 6 Different Colors
along with the option to turn it off


Which Blogger Themes Have a Navbar Enabled?

Historically Blogger had the Navbar enabled by default on all blogs however these days the Navbar only displays at the top of a blog on some of the older themes like Simple, Picture Window and Awesome Inc. If you are using a newer theme or have a third party theme it will not show up automatically and would need to be enabled. If you want to know more about how to turn on the Navbar keep reading as this Blogger tutorial covers this too.

If you would like to learn how to remove the Blogger Navbar to stop it showing up I touch on this in this tutorial but for more in-depth coverage of the topic I discuss several methods in my Blogger Tutorial on How to Remove or Disable the Blogger Navbar


How To Change the Color of the Navbar / Search Bar / Menu Bar on Blogger

Below is a step-by-step walkthrough of how to change the color of the menu bar above the header in Blogger.
  1. Sign in to Blogger and select the blog you wish to change

  2. From the Blogger Dashboard go to Layout Menu

  3. Find the Navbar section in Layout typically found at the top in the Blogger Layout Designer.

  4. Click the Edit link which appears on the right side of the Navbar Gadget.


  5. Click on the Edit Link to Open the Navbar Gadget in the Layout Page of Blogger to Change the Color of the Navbar
    Click on the Edit Link to Open the Navbar Gadget
    in the Layout Page of Blogger


    Edit Blogger Navbar - Former Blogger Navbar Layout Circa 2009  Showing Position of the Edit Button
    Former Blogger Navbar Layout Circa 2009
    Showing Position of the Edit Button


  6. Select the color of your choice by clicking on the radio button on the left side of each color in the pop up Navbar Configuration window that appears.

    If you want to turn off the Navbar altogether click on the off radio button found at the bottom of the menu of choices in the Navbar configuration window.

    Turn Blogger Navbar Off By Clicking on the Radio Button at the Bottom of the Navbar Configuration Pop-up Window
    Turn Blogger Navbar Off By Clicking on the Radio Button
    at the Bottom of the Navbar Configuration Pop-up Window


  7. Once you have made your selection click on the Save Button to save your changes

  8. Click View Blog to see the effect of changing the color of the Blogger Navbar to more closely match the design and style of your blog.

    Or if you have turned the Blogger Navbar off you will see that the Navbar has disappeared from the top of your blog.

Summary

In today's Blogger Tutorial I have discussed what the Blogger Navbar is, its uses and what Blogger themes have it by default. I have shown you how to change the color of the Blogger Navbar on your blog via the Navbar Gadget to one of six custom choices so that it matches the color and design of your blog.


Related Links

How to Remove or Hide the Blogger Navbar with HTML
How to Change Image Sizes in a Blogger Blogspot Blog
How to Change Image Sizes in Own custom Dimensions in a Blogger Post
How to Add a Print Friendly Button to Blogger
How to Change the Date of Blog Posts in Blogger
How to Remove Blogger Labels Counter
Add a Follow Me Twitter Icon Button to Blogger
Easy Ways to Put Banners on Blogger
How to Add a Welcome Message to Blogger Homepage
How to Unlock or Delete Locked Widgets in Blogger


Monday, June 1, 2020

How to Add a Sticky Welcome Message Post to Blogger Blog

How to add a sticky welcome message post to the Blogger homepage is a question that is often asked by beginner bloggers keen to make their blog more welcoming and attractive to visitors. By adding a welcome message above your blog posts readers landing on your blog will immediately be greeted by the welcome message. Adding a sticky welcome message is a simple addition to Blogger and it only takes a few minutes to create a nice friendly welcome message that sends clear welcome wishes to your blog visitors.
How to Add a Sticky Welcome Message to a Blogger Blog that offers welcome wishes to visitors

In this Blogger tutorial you will learn how to add a sticky welcome message to the main section in Blogger above the blog posts as seen in the image below. We have chosen to put the message above the post area because it is a placement that is very central for your readers to see your greeting when they land on your homepage. If you are interested in other placements like the sidebar or below the header then check out my detailed instructions on the other placement options for welcome messages on your Blogger blog in my companion article how to add a welcome message to a Blogger homepage.
How to Add a Sticky Welcome Message to Blogger Blog placed above the blog posts in the main section of Blogger - Example of a Welcome Message on blogger with customized colors and borders

Why Add a Sticky Welcome Message to Blogger

A sticky welcome message placed above your posts on the Blogger homepage will immediately grab your readers attention. You will engage your readers and if it hits the right note can promote trustworthiness in your blog and your content.

Blogger makes it easy to insert a text box above the posts and customize it to the look and color scheme of your blog using the Rich Text Editor. You can even add further advanced styling to your sticky welcome message using HTML code.  If you want to add third party scripts or videos just swap the text gadget for a HTML/Javascript gadget.

You can choose to place your welcome message only on the homepage or have your message display on every blog page. I have included instructions on how to show the welcome message on the homepage only.

How to Add a Sticky Welcome Post to Blogger Blog - Craft a Good Message to Engage the Visitor
Craft a Good Sticky Welcome Message Post to a Blogger Blog
to Engage the Visitor


Points to Consider When Adding a Sticky Welcome Message to Blogger 

Before you go ahead and create your sticky welcome message think about what you are going to say to attract a readership.  What value will your blog provide to a potential follower?  Are you informing or entertaining your readership?  Remember you are more likely to impress a visitor if they can easily identify how you can help them and what value to their lives your blog is going to provide them with.

It may be tempting to add your welcome message in the header instead of a blog description but I would advise against this. The blog description has an SEO benefit and needs to contain at least one of your keywords. It is far better to create that personal touch by generating your blog's welcome message using a Blogger text gadget and leave the blog description as a tagline that describes the purpose of your blog. For more on how to add a blog description to Blogger and why it is important to do so please visit my companion post.

Steps to Add a Sticky Welcome Message Above the Posts in a Blogger Blog

The following steps will help you put a sticky welcome message above the posts on all pages of your blog. If you only want it to appear on the homepage and not every post page then see below for instructions on how to display the message only on the homepage.

  1. Login to your Blogger account at Blogger.com

  2. From the Blogger Dashboard click on Layout from the menu on the left-hand side

  3. Click on the Add a Gadget link in the Main Posts section or Post Body section (called different names depending on what theme you are using)

    Note if there is no Add a Gadget link in the Main Posts section you may need to open up the section depending on your Blogger theme. I suggest you try adding the gadget to the sidebar first and then dragging it into the Main Posts area afterwards. If this doesn't work then please refer to my detailed step-by-step guide to Adding a Widget or Gadget Above a Blog Post in Blogger in which I show you how to open main section to add more gadgets.

  4. Select the Text gadget from the pop-up menu. You could also choose to use a html/javascript widget instead if you want to add third party scripts to your message.


  5. Use the Text Gadget to Add a Welcome Message Sticky to the Top   of the Main Post Section on the Blogger Homepage
    Use the Text Gadget to Add a Welcome Message Sticky to the Top
    of the Main Post Section on the Blogger Homepage


  6. Click on the plus+ icon at the right of the Text gadget to create your sticky welcome message.

  7. Give the gadget a name like welcome message to make it easy to identify later.

  8. Use the Rich Text Editor icons to add some simple styling to your sticky welcome message. Use Edit HTML if you need to add advanced styling. Check out my other posts for more on how to add advanced styling to Blogger.

  9. Use the Text Box Gadget to Craft Your   Sticky Welcome Post Message in Blogger
    Use the Text Box Gadget to Craft Your
    Sticky Welcome Post Message in Blogger


  10. Click Save to save your welcome message gadget.

  11. Click on Preview icon at the bottom right-hand corner to view your sticky welcome message.

  12. Once you are satisfied with your sticky welcome message drag it above the blog posts if it is not already there. Or if you created it first in the sidebar then drag the gadget over to the main section and position it above the blog posts gadget.

  13. Drag and Drop the Text Widget Sticky Welcome Message into the  Main Section Above Blog Posts in Blogger Layout
    Drag and Drop the Text Widget into the
    Main Section Above Blog Posts in Blogger Layout


  14. Click Save Arrangement once you are satisfied with the positioning of your Blogger welcome message by clickingon the save icon in the bottom right-hand corner.


  15. Click View Blog in the Dashboard and admire your new welcome message that is greeting your blog visitors.


How to Display a Welcome Message Only on the Homepage of Blogger

If you like the idea of a welcome message but would prefer to have it show only on the homepage rather than all pages it will require a manual edit of your Blogger template. Follow these steps to set the text gadget to only show up on the main page:

  1. Login to your Blogger if not already logged in

  2. Check the name of the welcome message gadget

  3. Return to the Dashboard and Choose Theme

  4. Click the down arrow denoted by the triangle next to the orange Customize button

  5. Choose Back up your theme to download your template in case

  6. Choose Edit HTML

  7. Click on the Jump to Widget icon in the top left corner of the editor

  8. From the drop down menu of widgets click on the gadget you created for your welcome message eg Text1

  9. The code that you jump to will look similar to this:


    <b:section class='main' id='main' name='Main' showaddelement='yes'>
    <b:widget id='Text1' locked='false' title='' type='Text' version='1'>
    <b:widget-settings>
    <b:widget-setting name='content'><![CDATA[<p style="background: #ffffff; border: double;">Welcome! At <span style="font-weight: bold;">Blogspot Blogger Guide</span> we show you the easy way.</p>]]></b:widget-setting>
    </b:widget-settings>
    <b:includable id='main'>
    <!-- only display title if it's non-empty -->
    <b:if cond='data:title != &quot;&quot;'>
    <h2 class='title'><data:title/></h2>
    </b:if>
    <div class='widget-content'>
    <data:content/>
    </div> <b:include name='quickedit'/>
    </b:if>
    </b:includable>
    </b:widget>


  10. Add the following line of code immediately after <b:includable id='main'> which adds an if statement saying homepage only:

    <b:if cond='data:blog.url == data:blog.homepageUrl'>


  11. Add the following line of code immediately before </b:includable>
    to close the if statement

    </b:if>


  12. The following shows the code with the if statement added and is highlighted in blue:
    <b:section class='main' id='main' name='Main' showaddelement='yes'>
    <b:widget id='Text1' locked='false' title='' type='Text' version='1'>
    <b:widget-settings>
    <b:widget-setting name='content'><![CDATA[<p style="background: #ffffff; border: double;">Welcome! At <span style="font-weight: bold;">Blogspot Blogger Guide</span> we show you the easy way.</p>]]></b:widget-setting>
    </b:widget-settings>
    <b:includable id='main'>
    <b:if cond='data:blog.url == data:blog.homepageUrl'>
    <!-- only display title if it's non-empty -->
    <b:if cond='data:title != &quot;&quot;'>
    <h2 class='title'><data:title/></h2>
    </b:if>
    <div class='widget-content'>
    <data:content/>
    </div> <b:include name='quickedit'/>
    </b:if>
    </b:includable>
    </b:widget>

  13. Click the Save icon from the row of buttons in the top right-hand corner

  14. You will be returned to the Dashboard. Click View Blog from the menu and navigate to several post pages to check that your welcome message is now only showing on the homepage rather than every page.


In today's Blogger tutorial I have shown you how to put a welcome message on your Blogger blog that extends welcome wishes to your blog visitors. The welcome message acts in the same way as a sticky note and always appears above your blog posts in the main section of your blog. A welcome message similar to the example can be added with a text gadget and can be customized and styled to suit any Blogger blog.


Related Articles

Basic Blogger Tutorials to Customize a Blogger Blog
Advanced Blogger Tutorials to Customize a Blogger Blog
How to Add a Welcome Message to a Blogger  Homepage
How to Change the Color of the Blogger Nav Bar
How to Put a Twitter Follow Icon on Blogger Next to Post Title
How to Add a Blog Description to the Blogger Page Header


Sunday, March 22, 2009

How to Resize Images in a Blogspot Blog Post to Custom Dimensions
In this Blogger tutorial about resizing images you will learn how to increase or decrease the displayed size of images in your Blogspot posts by changing the height and width of the picture to your own user defined dimensions. Making changes to images in your blog posts is a very easy trick requiring no change to your Blogger template. This Blogger tutorial is suitable for any blogger level from beginner to advanced users. (Updated 17 March 2022)
How to Resize Images in Blogger Posts to Custom Dimensions to Change Height and Width of Image by Overriding Blogspot Default Image Sizes

Blogger Default Image Sizes

By default Blogger has five image settings: small, medium, large and extra large and original size. When you upload an image to a Blogger post the image by default is displayed at medium (320 px width) unless you change it to another size from the popup window that appears at upload. For instance if you choose large Blogger will automatically make the image bigger by scaling it to fit 400 pixels in width by 300 pixels in height and display it at the next size up.

Here are the different width sizes for uploaded images that Blogger offers:

  • Small = 200px width
  • Medium = 320px width
  • Large = 400px width
  • Extra Large = 640 width
By giving bloggers on Blogspot the choice of four preset images sizes or the original image size Blogger takes the headache out of bloggers knowing what size to set an image at. It also means that despite the varying original sizes of uploaded images Blogger is able to display them all uniformly.
Set your own custom dimensions for images in Blogger blog posts

Resize Blogger Images Prior to Upload and Then Change to Original Size

There are, however, times when you might want to change the image size to your own user defined specifications rather than sticking with the Blogger defaults. One way to override the preset image sizes in Blogger is to change the settings to display the image at the original size. This works well if you have resized the image prior to upload and you want the image to display at the width and height you have already preselected. To get help resizing an image prior to upload you could try a free online image resizing service like resizeimage.net.

Change Blogger Image Defaults to User Defined Dimensions

If you don't want to go for the hassle of resizing all your images before uploading and you only have a few images that you want to display at different sizes then the method described below is likely to work best. One thing to keep in mind though is that you want to make sure that when you put in your own dimensions that you do not distort the image. To get help to keep the same image proportions you could try a free online image resize calculator like red-route.org which will calculate the dimensions to enter.

Steps to Make Uploaded Images Larger/Smaller in Blogger


1. Log in to Blogger if not already logged in.

2. Go to Posts >> New Post or if you want to edit an image already posted go to Posts >> Edit Post

3. Upload your chosen image or if you are editing your post identify the image you want to change

4. Switch from the Compose View to Edit HTML View which will allow you to see the HTML code of your post

5. Find the code block for the image you wish to change. Look for the code that begins <img style> For example for the following image:

img style="display:block; margin:0px auto 10px; text-align:center;cursor:pointer; cursor:hand;width: 400px; height: 300px;" src="https://3.bp.blogspot.com/_vLeiVavkV_M/SjMKOjXnmYI/XXXXXXXXX/Ra0BizPIDsc/s400/twitter123.jpg" border="0" alt="" id="BLOGGER_PHOTO_ID_5346628427747662210" />

This code will display the image in a Blogger post at the large size - 400x300.
Increase image size in a Blogger Blogspot blog
6. To change the 400x300 dimensions it is simply a matter of changing the values to whatever you wish. Make sure you keep the proportions of the image otherwise it will not display correctly (stretched and distorted). For example to increase the image size displayed by 25% you would change the dimensions to 500x375:

img style="display:block; margin:0px auto 10px; text-align:center;cursor:pointer; cursor:hand;width: 500px; height: 375px;" src="https://3.bp.blogspot.com/_vLeiVavkV_M/SjMKOjXnmYI/XXXXXXXXX/Ra0BizPIDsc/s400/twitter123.jpg" border="0" alt="" id="BLOGGER_PHOTO_ID_5346628427747662210" />


This code will display the image in a Blogger post to the custom dimensions of 500x375.


7. Click the Preview button and you will be able to check your image before publishing

8. Once you are satisfied click on the Publish post button

9. Click View Blog to see your image displayed with your user defined proportions


Summary

At sometime you may want to display an image in your Blogger post that is different from the Blogspot default image size presets of small, medium, large, extra large. It is possible to make an image smaller or larger than these presets by overridging the Blogspot default image sizes and entering your own custom dimensions. This tutorial has shown you how to change the height and width values of an image in order to make it bigger or smaller depending on need.


Related Articles

How to Add a Welcome Message to a Blogger  Homepage
How to Change the Color of the Blogger Nav Bar
How to Put a Twitter Follow Icon on Blogger Next to Post Title
How to Change Image Sizes in Blogger Posts
How to Schedule Blog Posts in Blogger in 2022
How to Add an Atom Sitemap to Google Search Console from a Blogger Blog in 2022

Wednesday, February 25, 2009

Make Money from Affiliate Program Banners and Links with a Blogger Blog

One of the very nice aspects of blogging with Google Blogger is that you can monetize and generate income by adding affiliate links and banners to your Blogger blog (Blogspot blog) alongside Google Adsense. Clickable affiliate links can also be placed in blog posts that earn you money if a visitor clicks through and then purchases a product or service that you mention. Placing a few affiliate banners on your blog will also help you make money passively as your blog grows and traffic increases.
Making Money from Affiliate Links and Banners with a Blogger Blog - Tips and Advice to Start Earning on Blogspot

How Does Affiliate Marketing Work with a Blogspot Blog?

Generally speaking when a visitor clicks on an affiliate banner or link on your blog and signs up to a service or buys a product you will make money from that click. Different services have different rules about what the referer has to achieve in order to earn an affiliate fee or commission but most work on a percentage of the sale.

Put simply the process of making money from affiliate marketing is as follows:
  • Start a Blog on Google Blogger

  • Decide on a product or service to promote that fits with your blog topic and niche and which you are happy to endorse.

  • Sign up to become an affiliate to promote the product or service. Pay particular attention to: amounts paid, frequency of payouts, threshold for payouts, legal obligations and restrictions.

  • Write some blog posts and add links to your article promoting the product or service eg Product reviews are good blog posts for placing advertising links and banners.

  • Promote the product on your Blogger blog with affiliate links and banners in other places like the sidebar.

  • Build traffic by posting quality content. The more visitors you get to your Blogger blog the more likely that someone will click on your affiliate link or banner.

  • Set up email marketing as a way to promote your blog. You can insert affiliate links and banners in emails.


Start referring visitors from your Blogspot Blog to affiliate programs using links and banners in your posts and on your blog to earn cash in addition to Google Adsense

How Much Does it Cost to Put Affiliate Banners on a Blogger Blog?

There is no cost involved in adding banners to Blogger - it is 100% FREE.


Can I Add Affiliate Banners and Links with Only a Blogspot Subdomain?

Yes. Blogger allows you complete freedom to monetize your blog by promoting whatever service or product you like provided you stay within their guidelines around acceptable content regardless of whether you are using a subdomain (blogspot) or your own domain (.com).
Affiliate Banners and Links can be added to Blogger Blog with either a Blogspot Subdomain or a Custom Domain

Some affiliate programs require a custom domain and a minimum level or traffic while others readily accept the blogspot subdomain URL.


How Do I Add Affiliate Banners to Blogger?

It is pretty simple to add affiliate banners to Blogger. Anyone who knows how to copy and paste can add a few banners in no time. Banners can placed in the sidebar, above and below posts and above, below or in the header.

For help on where to place banners and how to add banners to Blogger please refer to my Blogger tutorial entitled Easy Way to Put Banners on Blogger (Blogspot) Blog


How Do I Start a Blog to Earn Money from Affiliate Marketing

You can start a free blog at Google Blogger and add a few banners to your blog to earn affiliate income while you sleep. If you are yet to create a free Blogger account please refer to my related Blogger Tutorials to get your started:


These articles will have you up and running with Blogger in no time.


What are the Best Affiliate Marketing Programs to Promote with a Blogger Blog

There are thousands of affiliate marketing services and so thousands of opportunities to find a good fit with your blog. If you are looking for some top high-paying affiliate programs that are considered to be some of the very best in 2022 you could try these top picks:

  • Fiverr - affiliate program and promoter of the world’s biggest marketplace for online services

  • Blue Host, Hostinger or HostGator - web hosting services that offer very low cost monthly plansto customers and good returns on referrals

  • Pure VPN, SurfsharkVPN, NordVPN and ExpressVPN - internet connection services with good affiliate programs

  • Wix and Shopify - best website and ecommerce affiliate programs

  • ShareaSale, CJ (Formerly Commission Junction) and Rakuten - best affiliate networks

  • Aweber and ConvertKit - email marketing services affiliate programs

  • Tripadvisor and Expedia - good affiliate programs if your blog is in the travel niche

  • H&M and Nordstrom - fashion affiliate programs if your blog has a fashion theme

  • Madison Reed and Avon - beauty and makeup affiliate programs

  • Amazon Associates - affiliate program with massive range of possible goods to promote


How Do I Get Started with Affiliate Marketing on Blogger


  • Create a free Blogger account

  • Set up your Blogger Blogspot blog and configure the settings

  • Identify a product or service to promote and sign up to a referral program in your niche

  • Add affiliate links and banners to blog posts

  • Add affiliate links and banners to your blog either around the header or in the sidebar.


In this article I have explored how you might start making money with affiliate marketing and a Google Blogger blog. You could earn money by signing up for affiliate programs and then placing affiliate links and banners on your blog and in your blog posts in addition to earning revenue from Google Adsense. What are you waiting for get a free Google Blogger account today, monetize it and start making a side income from blogging.


Related Articles
Create a free Blogger account
Set up your Blogger Blogspot blog
Easy Way to Put Banners on Blogger (Blogspot) Blog